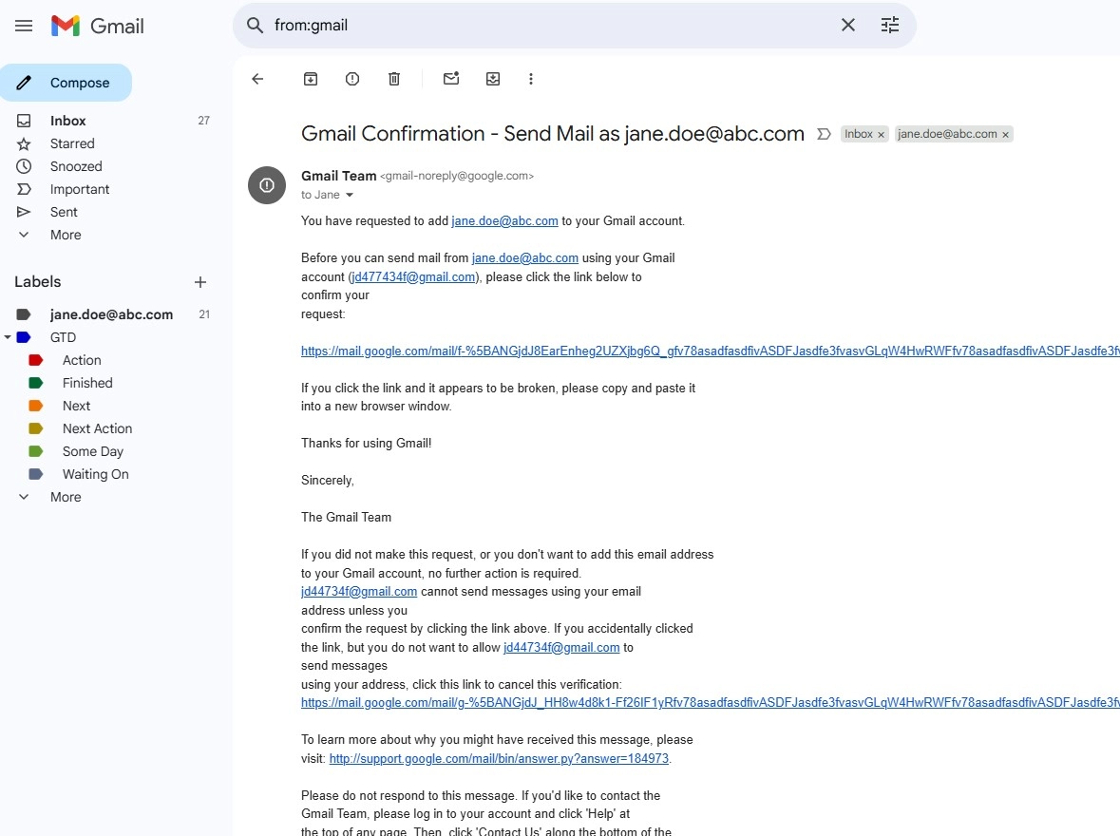

If you want the convenience of checking your company email ([email protected]) and your personal Gmail in one place, you’ve come to the right guide. This process will set up your Gmail account to securely pull in (or “fetch”) emails from our server, so you can read, reply, and organize everything from the familiar Gmail interface.
We will be using the POP3 method, which is a reliable way to retrieve your mail without causing server conflicts.
Before You Begin
Please have the following three pieces of information ready:
- Your full email address: For example,
[email protected]. - Your email password: The same one you use to log into our webmail.
- Our incoming server name: This is
webmail.cazarin.com.
(Note: For a few specific users, this might bewebmail2.cazarin.com. If the first one doesn’t work, please try the second one.)
Configure Receiving Mail (Fetch)
Step 1: Go to Your Gmail Settings
-
Log in to your Gmail account on a desktop computer.
-
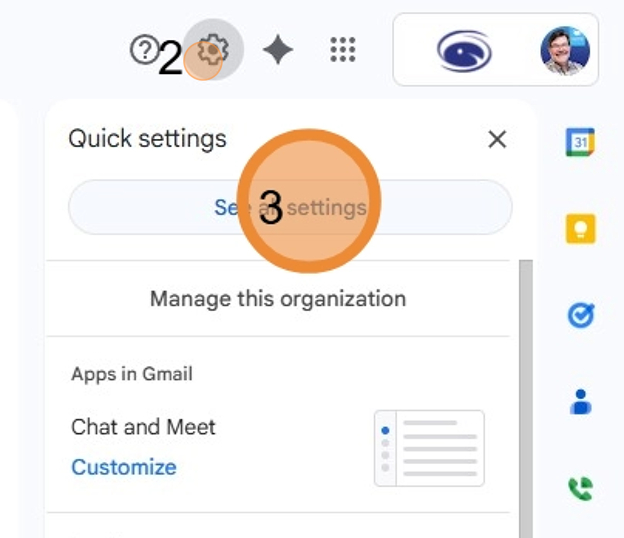
Click the Gear icon ⚙️ in the top-right corner.
-
A quick settings menu will appear. Click the “See all settings” button at the top.
Step 2: Add Your Other Mail Account
-
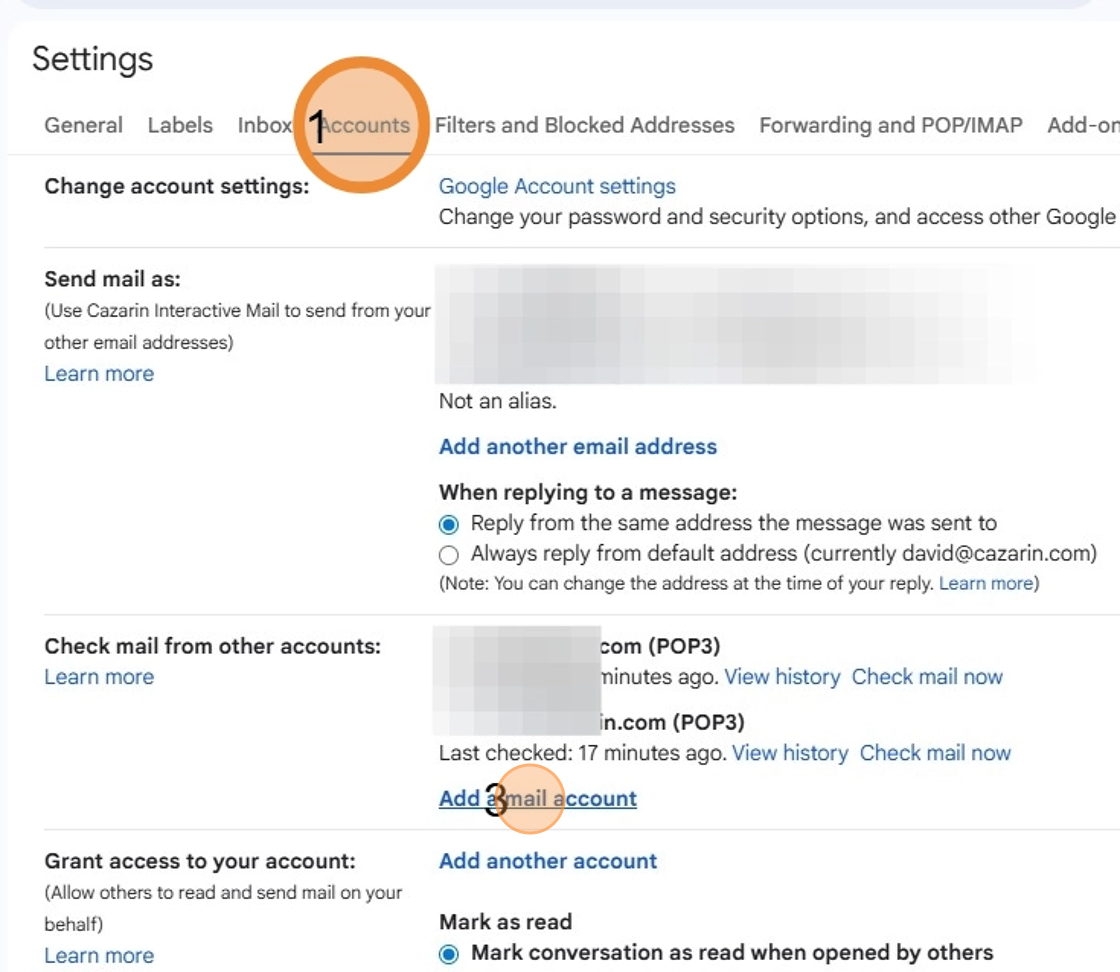
In the Settings screen, click on the “Accounts and Import” tab.
-
Look for the section named “Check mail from other accounts.”
-
Click on the link that says “Add a mail account.”
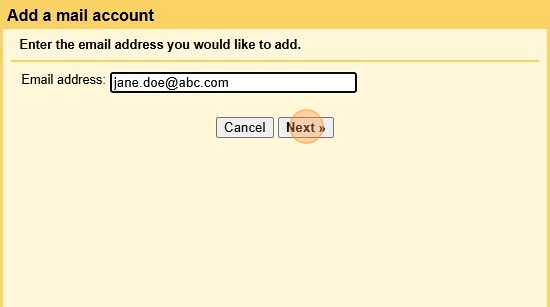
A yellow pop-up window will appear.
-
Enter your full company email address (e.g.,
[email protected]). -
Click “Next.”
-
On the next screen, select “Import emails from my other account (POP3)” and click “Next.”
Step 4: Enter Your Server Settings
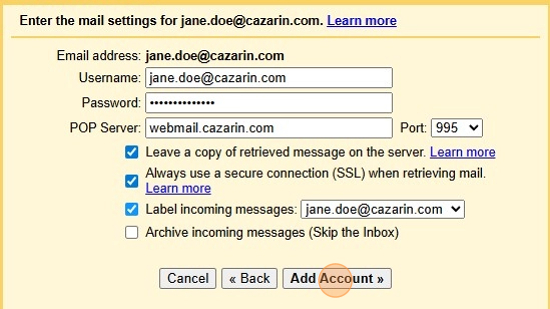
This is the most important step. Fill out the fields exactly as shown below, replacing our example with your own information.
-
Username: Your full email address (
[email protected]). -
Password: Your email password.
-
POP Server:
webmail.cazarin.com
(orwebmail2.cazarin.comif that applies to you). -
Port: Change this to
995.
Now, check the following boxes:
-
☑️ Leave a copy of retrieved message on the server. (This is very important for backup!)
-
☑️ Always use a secure connection (SSL) when retrieving mail. (This is required for Port 995).
-
☑️ Label incoming messages… (This is optional but highly recommended. It will create a folder/label in Gmail for your work emails, keeping you organized).
The screen will look similar to this!
Click “Add Account.”
When all information is correct, you will see a success message.
Configure Sending Mail
Step 5: Configure Sending Mail (Optional, but Recommended)
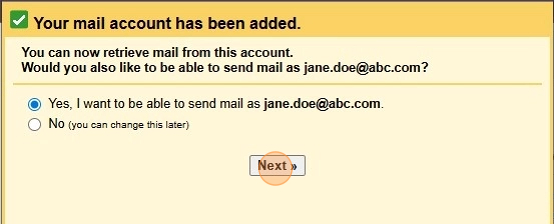
Gmail will now ask if you also want to be able to send mail as [email protected]. We recommend you select “Yes” and click “Next.”
Step 6: Configure Sending Mail
-
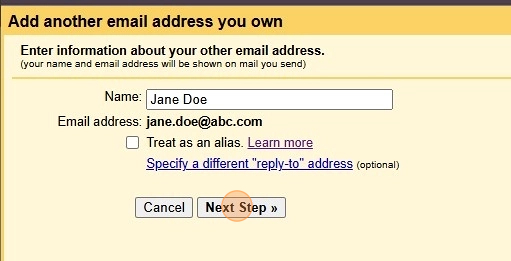
Enter the name you want people to see when you send them an email.
-
☑️ Treat as an alias.
I strongly recommend reading the “Learn More” link.
This example will continue with the box unchecked. -
Click “Next Step.”
Step 7: Configure Sending Mail
-
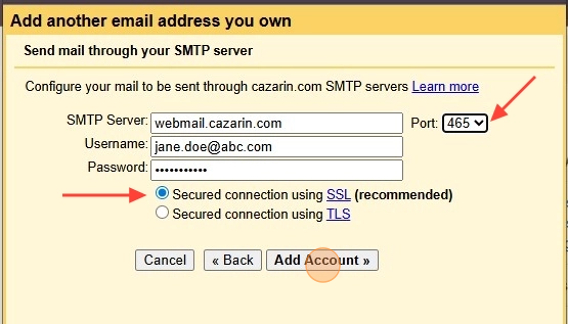
On the “Send mail through your SMTP server” screen, fill out the following:
-
SMTP Server:
webmail.cazarin.com(orwebmail2.cazarin.com). -
Username: Your full email address (
[email protected]). -
Password: Your email password.
-
Port: Change this to
465. -
Select the option for “Secured connection using SSL.”
-
-
Click “Add Account.”
Step 8: Confirmation
Close window or resend email if you didn’t receive it.
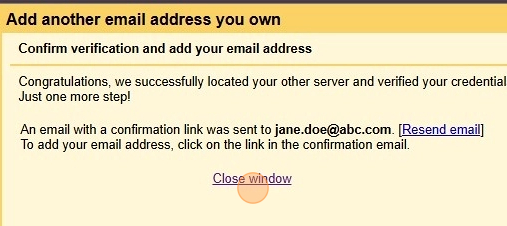
Step 9: Confirmation Step
If you entered Send Mail you will need to confirm the account by following the steps within the Gmail Confirmation email.